Easy DIY | How to Install Basement Ceiling Insulation
This post may contain affiliate links, meaning I make a commission if you purchase through my links, at no extra cost to you. Disclosure here
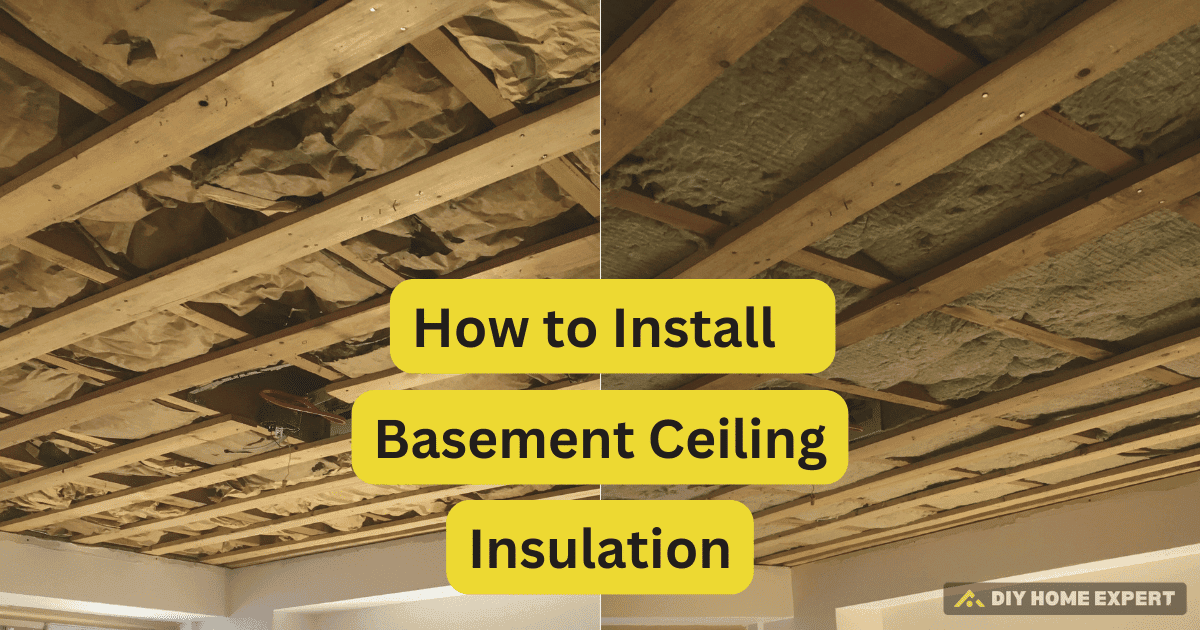
Follow our simple, step-by-step guide with easy-to-follow pictures to learn how to install basement ceiling insulation.
Are you seeking a solution to reduce noise transmission from the upper floors of your home?
As homeowners with lively children and plans to turn our basement into a rental unit, we found that proper ceiling insulation was crucial not only for soundproofing but also for enhancing the safety and energy efficiency of our living space.
This article offers a detailed, step-by-step guide to installing basement ceiling insulation, complemented by clear, instructive images that make each stage easy to follow. You’ll find practical tips and insights to help you efficiently enhance your basement’s comfort and functionality.
Project Snapshot
Installing basement ceiling insulation is a manageable project that can be completed over a weekend, ideal for homeowners looking to improve their property’s acoustic performance, thermal efficiency, and fire safety. The cost and time investment will vary based on the size of your basement and the type of insulation you choose.
Working Time
3-6 hours, depending on the basement surface
Skill Level
Intermediate
Estimated Cost
$0.50 – $3.00 per square foot, depending on the insulation type and material
What You Will Need
Equipment / Tools
- Measuring Tape: To accurately measure the area of your basement ceiling and the spacing between joists.
- Utility Knife: For cutting insulation to the required sizes. Ensure you have extra blades as insulation can dull them quickly.
- Straight Edge or Level: Aids in making straight cuts in insulation material.
- Staple Gun (for faced insulation): Used to secure faced insulation to the joists.
- Safety Glasses: To protect your eyes from insulation fibers and dust.
- Dust Mask or Respirator (N95): Essential for protecting your lungs from fine particles and insulation fibers.
- Disposable Coveralls: To keep insulation fibers off your clothing, which can be irritating to the skin.
- Gloves: To protect your hands from irritation while handling insulation.
- Ladder: If your basement ceiling is high, a ladder will be necessary to safely reach all areas during installation.
Materials
- Insulation: Choose from rolls, batts, or loose-fill insulation based on your needs and the type discussed in the previous sections.
- Vapor Barrier (if using unfaced insulation): Necessary in humid climates to prevent moisture from penetrating the insulation.
- Insulation Supports or Wire Mesh (if required): To hold loose-fill or batt insulation in place between joists.
- Acoustic Sealant (optional): To seal gaps and ensure airtightness, enhancing both thermal efficiency and soundproofing.
- Furring Strips (optional): Used if you plan to install a dropped ceiling below the insulation for improved aesthetics and additional space for running electrical or plumbing lines.
Why We Need Basement Ceiling Insulation
Basement ceiling insulation is essential in protecting below-ground living areas from cold, noise, and potential fire hazards. It’s particularly vital in homes like ours, where noise from daily activities can disrupt the peace of the tenant below. Here’s why ROCKWOOL Safe’n’Sound® was an excellent choice for our insulation needs:
- Acoustic Performance: Specially designed to reduce noise transfer between floors, ensuring a quieter living environment.
- Fire Resistance: Withstands temperatures over 1000°C, providing superior fire protection.
- Energy Efficiency: Keeps your basement warm during winter and cool during summer, reducing heating and cooling costs.
Choosing the Right Insulation
Selecting the right type of insulation for your basement ceiling involves considering several factors, including the specific needs of your space, your budget, and the climate you live in. Here’s how to make the best choice:
- Measure Your Space: Begin by measuring the total square footage of your basement ceiling. This will determine how much insulation you’ll need. Additionally, measure the spacing between the joists, as this will influence the size of the insulation rolls or batts you select.
- Understand R-Values: The R-value of insulation measures its ability to resist heat flow. The higher the R-value, the better the insulation’s thermal performance. Choose an insulation with the R-value recommended for your climate zone. This information can typically be found on the U.S. Department of Energy’s website or through local building codes.
- Select the Material Type:
- Fiberglass Batts and Rolls: These are common and generally the most affordable. They are suitable for DIY projects and provide good thermal and acoustic insulation.
- Stone Wool (ROCKWOOL): Excellent for fire resistance and sound dampening. This material is denser and more effective at blocking noise and managing temperatures.
- Spray Foam: Provides an airtight seal and is great for irregular spaces or areas with lots of obstructions. However, it is more expensive and typically requires professional installation.
- Decide Between Faced and Unfaced:
- Faced Insulation: Comes with a vapor barrier which helps prevent moisture from passing through. This is crucial in humid climates or in areas where moisture control is a concern.
- Unfaced Insulation: Does not have a vapor barrier and offers more flexibility in how and where it can be used. It’s often used for re-insulating over existing insulation.
- Consider Environmental and Safety Features: Opt for insulation materials that are non-toxic and environmentally friendly. Check for certifications like GREENGUARD or formaldehyde-free labels to ensure indoor air quality is maintained.
By carefully considering these factors, you can choose the insulation that best meets the needs of your basement project, ensuring optimal performance in terms of energy efficiency, sound control, and safety.
How to Install Basement Ceiling Insulation
STEP 1 | Preparation
- Safety First: Wear disposable coveralls, safety glasses, gloves, and a dust mask or respirator to protect against insulation fibers and dust.
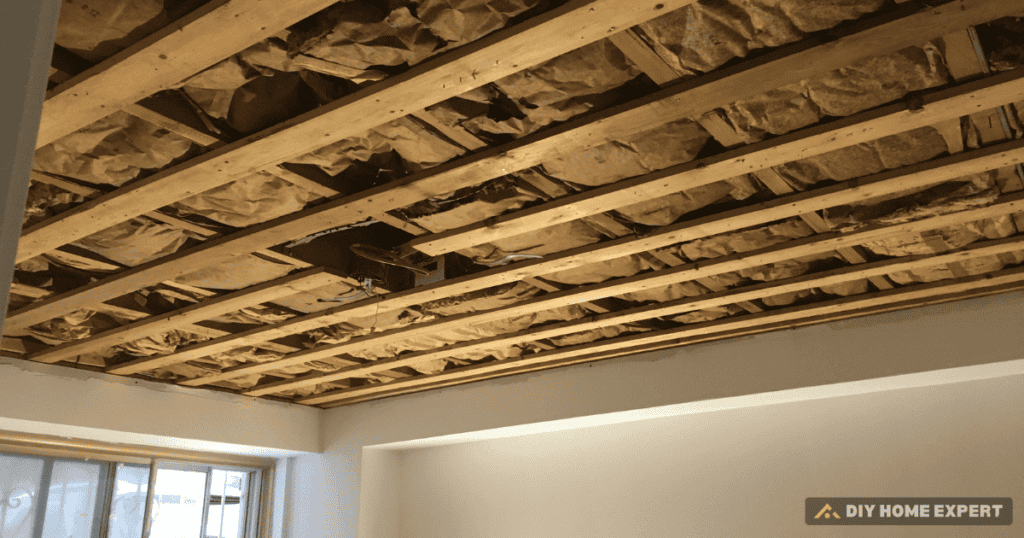
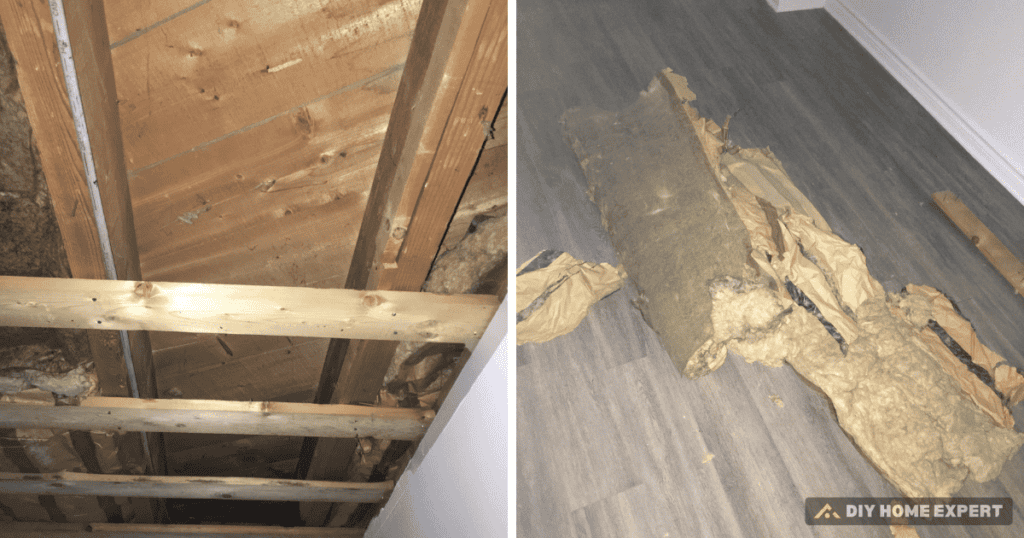
- Clear the Area: Remove any old insulation if necessary. Clear the ceiling of dust, cobwebs, and debris using a broom or vacuum.
STEP 2 | Measuring and Cutting the Insulation
- Measure: Use a measuring tape to determine the length of insulation needed between the joists. Always measure twice for accuracy.
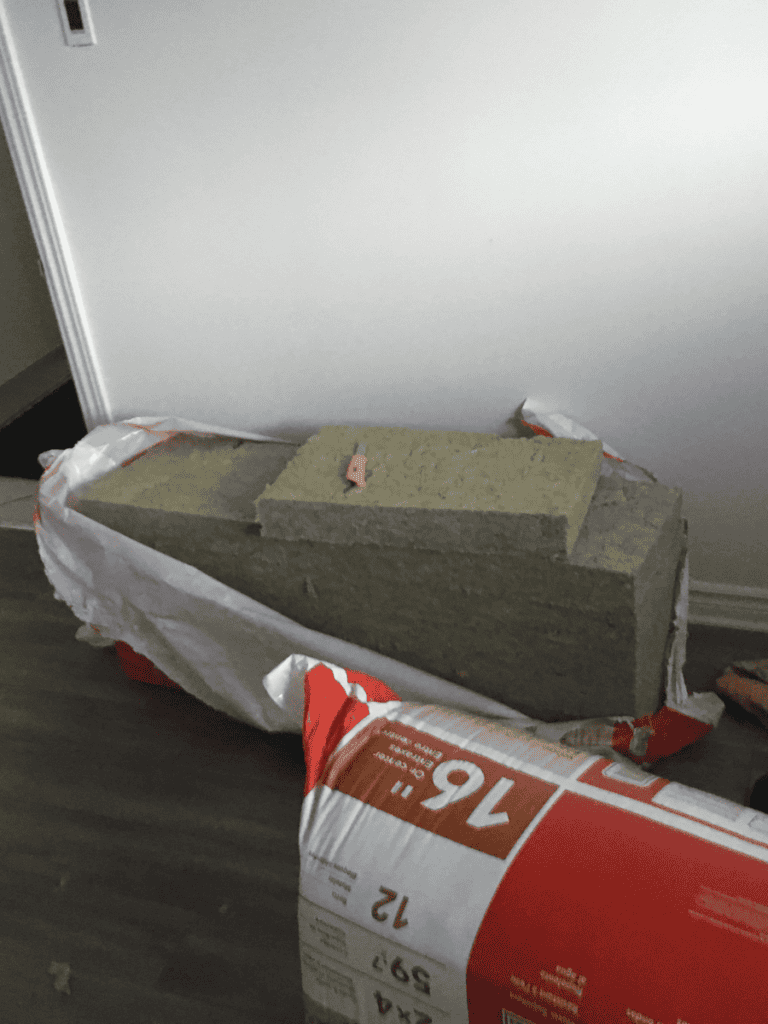
- Cut the Insulation: Lay the insulation on a flat surface. Use a straight edge and a utility knife for clean cuts. For materials like ROCKWOOL, a serrated blade may be necessary.
It’s best to prepare a new blade to ensure clean cuts. I laid the insulation on the ground and used a four-foot level as a straight edge to make precise cuts with a utility knife.
STEP 3 | Installing the Insulation
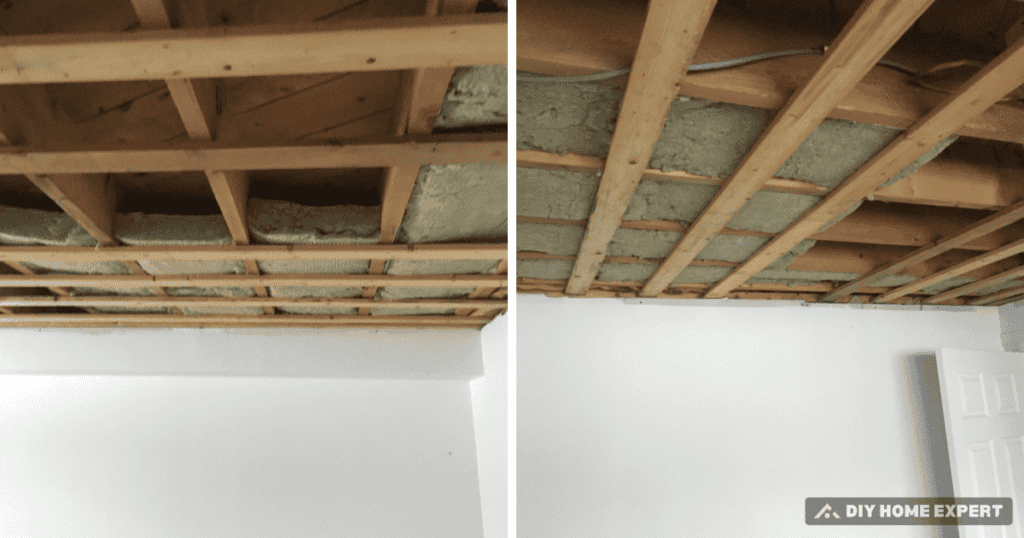
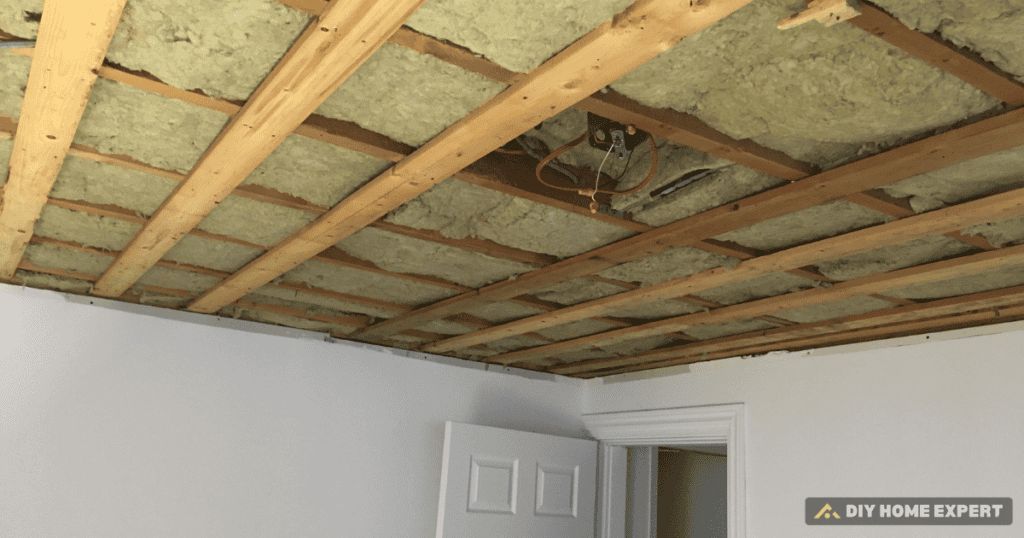
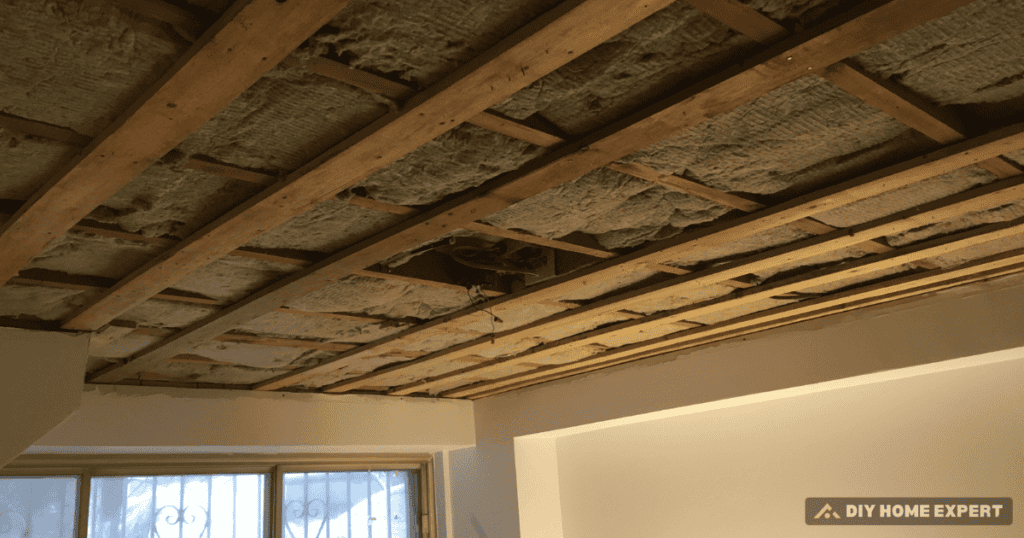
- Fit the Insulation: Start at one end of the basement and fit the insulation between the joists snugly. Ensure no gaps around the edges. If using batts or rolls, they should be flush against the subfloor above.
- Secure the Insulation: If using faced insulation, staple the flanges to the joist sides every 6 to 8 inches. For unfaced insulation, consider using insulation supports or wire mesh to keep it in place.
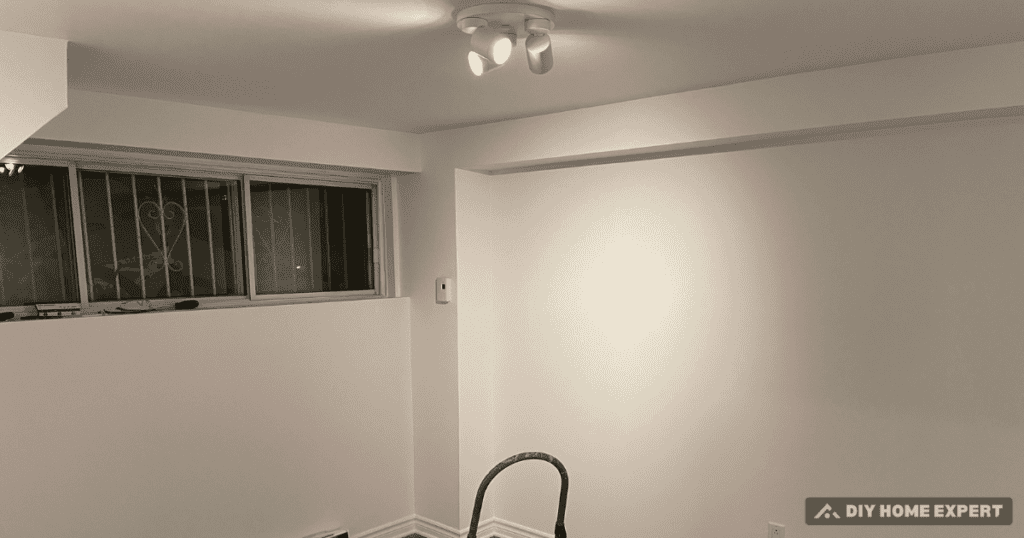
With this insulation I am using it actually fills in the entire joist pocket and stays in place just fine with a friction fit and I will be installing drywall under the insulation as well.
Pro Tips | Prevent Muscle Strain
Stay Comfortable: Working with your arms overhead for long periods can be taxing.
Remember to:
Stretch your arms and back regularly.
Take frequent breaks to avoid fatigue.
Use a step stool to maintain a good posture and reduce strain.
Keep these tips in mind to stay comfortable and safe while working on your home improvement projects.
STEP 4 | Dealing with Obstructions
- Pipes and Wires: Cut the insulation to fit snugly around any pipes, wires, or other obstructions to prevent energy leaks.
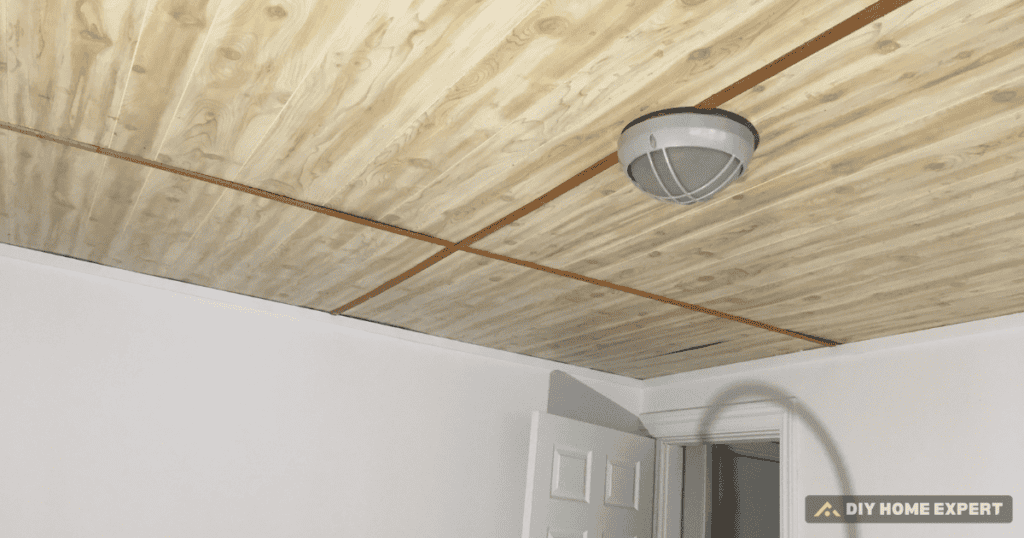
- Electrical Fixtures: Maintain clearance around light fixtures to prevent overheating. Ensure that any recessed lighting fixtures are insulation-contact (IC) rated if covered by insulation.
STEP 5 | Adding a Vapor Barrier (if applicable)
- Install Vapor Barrier: If using unfaced insulation, add a vapor barrier over it to prevent moisture ingress. Overlap the edges of the plastic sheeting and staple it to the joists.
STEP 6 | Final Inspection and Cleanup
- Check for Gaps: Ensure there are no gaps or spaces where air can flow through. This can undermine the insulation’s effectiveness.
- Clean Up: Remove all tools and leftover materials. Properly dispose of waste and vacuum any debris and fibers that have settled during the installation.
Looking to change you indoor light switch too? Check out our guide here.
Need to learn how to replace an Outdoor Light Fixture? Check out our guide here.
Additional Pro Tips
- Ensure a Tight Fit: Make sure there are no gaps between the insulation batts or rolls. Cut the insulation precisely to fit around any obstacles, ensuring maximum efficiency and minimal thermal bridges.
- Maintain Insulation Integrity: Do not compress the insulation. Use the correct depth of insulation to fill the cavity without being squashed.
- Consider the Direction of Facing: For faced insulation, the vapor barrier should face the warm side (toward the interior of the home).
- Enhance Soundproofing: Consider adding an extra layer of drywall with acoustic sealant between layers for enhanced soundproofing. Using resilient channels or furring strips can also help reduce sound transmission.
- Safety Considerations: Always use protective gear and be cautious around electrical fixtures.
By following these detailed steps and incorporating the provided tips, your basement ceiling insulation project will enhance the comfort, safety, and energy efficiency of your home, providing long-lasting benefits.
Update Your Home with Confidence! For more DIY tips and home improvement ideas, follow us on Pinterest at DIY Home Expert. Elevate your home’s exterior easily with our expert guidance and inspiring projects.
When to Choose Faced or Unfaced Insulation
When installing basement ceiling insulation, one of the choices you’ll need to make is whether to use faced or unfaced insulation. Each type has specific applications and benefits, depending on your basement’s needs and the climate you live in.
FAQ
1. Can I install basement ceiling insulation myself, or should I hire a professional?
DIY vs. Professional: Installing insulation can be a DIY project if you are comfortable with basic home improvement tasks. However, for materials like spray foam or if you’re unsure about handling potential hazards (like mold or asbestos in old insulation), hiring a professional is recommended.
2. What is the best type of insulation for noise reduction in a basement?
Soundproofing Options: For superior noise reduction, materials like ROCKWOOL Safe’n’Sound® are ideal due to their density and sound-absorbing properties. Additionally, using double-layer drywall with acoustic sealant can further enhance soundproofing.
3. How do I know how much insulation I need for my basement ceiling?
Calculating Requirements: Measure the square footage of your ceiling and check the coverage provided by each package of insulation. Remember to account for any obstructions that might reduce the area you need to cover and purchase slightly more than calculated to ensure you have enough.
4. Is a vapor barrier necessary when insulating a basement ceiling?
Vapor Barrier Use: In most cases, especially in humid climates or if the basement has moisture issues, a vapor barrier is recommended to prevent moisture from penetrating and damaging the insulation. Faced insulation typically includes a vapor barrier, making installation simpler.
5. How can I ensure that the insulation will not sag over time?
Preventing Sagging: For batts and rolls, ensure they are snugly fit between joists. Using wire mesh or insulation supports can help hold loose-fill or unfaced insulation in place, preventing it from sagging as it ages.
6. What safety gear should I wear when installing insulation?
Safety Gear Recommendations: Always wear long sleeves, pants, gloves, a dust mask or respirator, and safety goggles. This protects your skin, lungs, and eyes from irritation caused by insulation fibers.
7. Can insulation help with energy costs in the basement?
Energy Efficiency: Absolutely, insulation helps maintain a consistent temperature in the basement, reducing the demand on heating and cooling systems and leading to lower energy costs.
What R-value insulation should be used for basement ceilings and walls?
R-value ranging from R-30 to R-60: For basement ceilings, particularly when insulating between an unfinished basement and the living spaces above, it’s recommended to use insulation with an R-value ranging from R-30 to R-60 to optimize energy efficiency and comfort. For the walls, an R-value of R-15 to R-19 is typically advised in most climates to ensure adequate thermal resistance. These recommendations can help maintain a comfortable indoor environment and reduce energy costs.
Additional Resources
For those looking to delve deeper into basement ceiling insulation or seeking specific guidance tailored to their situation, here are several resources that can be invaluable:
- The U.S. Department of Energy’s Website:
- Provides extensive information on insulation types, recommended R-values by region, and tips for energy-efficient home improvements.
- U.S. Department of Energy
- Building Science Corporation:
- Offers detailed research papers and case studies on building materials and methods, including best practices for insulation.
- Building Science Corporation
- ROCKWOOL’s Official Website:
- Find installation guides, product specifications, and case studies specific to ROCKWOOL insulation products.
- ROCKWOOL Resources
- Local Building Code Information:
- Contact your local building department for specific regulations and requirements for insulation in your area, which can affect both material choice and installation techniques.
These resources provide a wealth of information that can help ensure your insulation project is a success and meets all applicable standards and best practices.

