How to Replace an Outdoor Light Fixture
This post may contain affiliate links, meaning I make a commission if you purchase through my links, at no extra cost to you. Disclosure here
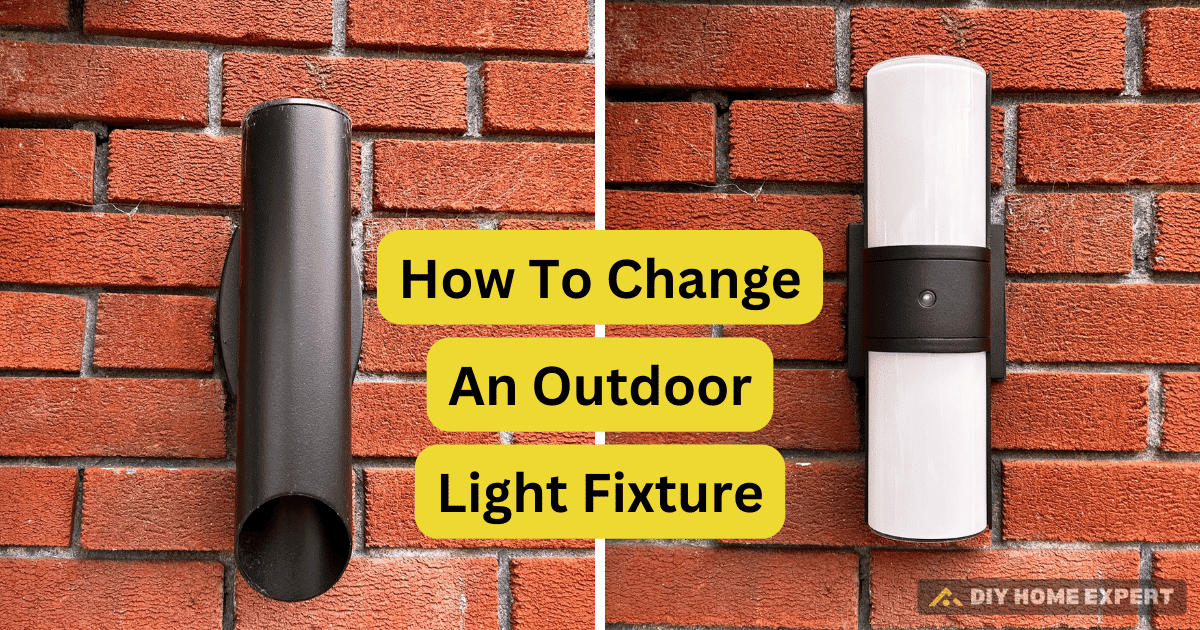
Follow our simple, step-by-step guide with easy-to-follow pictures to learn how to replace an outdoor light fixture.
Want a quick and cost-effective way to enhance your new home’s curb appeal? As a new homeowner, simple DIY projects like upgrading your outdoor light fixture can make a significant difference in your home’s appearance. In this guide, we’ll walk you through each step of replacing an outdoor light fixture, complete with clear, easy-to-follow pictures, enabling any homeowner to boost their property’s aesthetic effectively.
Project Snapshot
Time
30 minutes
Level
Beginners
Cost
50$ to 150$
What You will need
Equipment / Tools
- Screwdriver: Needed for removing and securing screws on the light fixture.
- Pliers: Useful for adjusting or holding wires during connection.
- Electric Drill: Required for mounting the new fixture, especially if new holes need to be drilled.
- Voltage Tester: Essential for ensuring the power is off before starting the installation.
- Safety Glasses: Protects your eyes from electrical sparks or debris during installation.
- Ladder or Step Stool: Needed to reach fixtures installed at height.
Materials
- New Outdoor Light Fixture: Ensure you have purchased the correct style and rating for outdoor use.
- Electrical Tape: Used for insulating and securing wire connections.
Pro Tips | Choosing the Right Fixture
In areas with harsh winters, choosing outdoor light fixtures that are tough and weather-resistant is essential. I opted for LED fixtures rated for outdoor use, which stand up well to freezing temperatures and help reduce energy costs. I also made sure the style and size complemented my home’s exterior to maintain a cohesive look. When selecting your fixture, consider both the climate resilience and how well it integrates with your home’s design.
How to Replace an Outdoor Light Fixture
STEP 1 | Safety First!
Safety first—make sure the outdoor light is turned off at the switch. Then, shut off the power to the circuit that the outdoor light is on by switching off the appropriate breaker at your main electrical service panel. Verify that the power is completely off by testing the wires with a voltage tester.
Turning Off the Power
- Locate your home’s circuit breaker or fuse box and switch off the power to the area where you’ll be working. This is typically labeled for easy identification.
- Double-check that the power is off by using a voltage tester on the light switch. No lights on the tester means you’re good to go.
Safety Tips
- Inform everyone in the household that you are working on the electrical system to prevent someone from accidentally turning the power back on.
- Wear rubber-soled shoes and use insulated tools to minimize the risk of electrical shock.
- Keep a flashlight handy if you’re working in a poorly lit area.
By following these safety steps, you’re setting yourself up for a successful and injury-free installation of your new light switch. Remember, if you’re ever uncertain or uncomfortable with the process, there’s no harm in consulting a professional electrician.
STEP 2 | Inspect the New Fixture
Before beginning the installation, thoroughly inspect your new outdoor light fixture and all accompanying components. Ensure the package includes a metal mounting bracket, screws, wire nuts, cap nuts, and washers. Examine the light fixture itself for any damage or defects in the glass or frame and check the wiring for integrity. This initial inspection helps avoid the inconvenience of discovering issues midway through installation.
STEP 3 | Remove the Existing Fixture
Use a ladder or step stool to reach the old outdoor light fixture safely. Begin by removing the light cover and unscrewing the light bulb. Then, carefully unscrew the mounting screws that hold the fixture’s cover plate to the electrical box. Allow the fixture to hang gently from the wires if it does not come off easily after unscrewing.
STEP 4 | Check for Power With the Voltage Tester
With the fixture hanging, use your voltage tester to double-check that there is no electricity flowing in the wires. This step is crucial for ensuring your safety as you proceed with the installation.
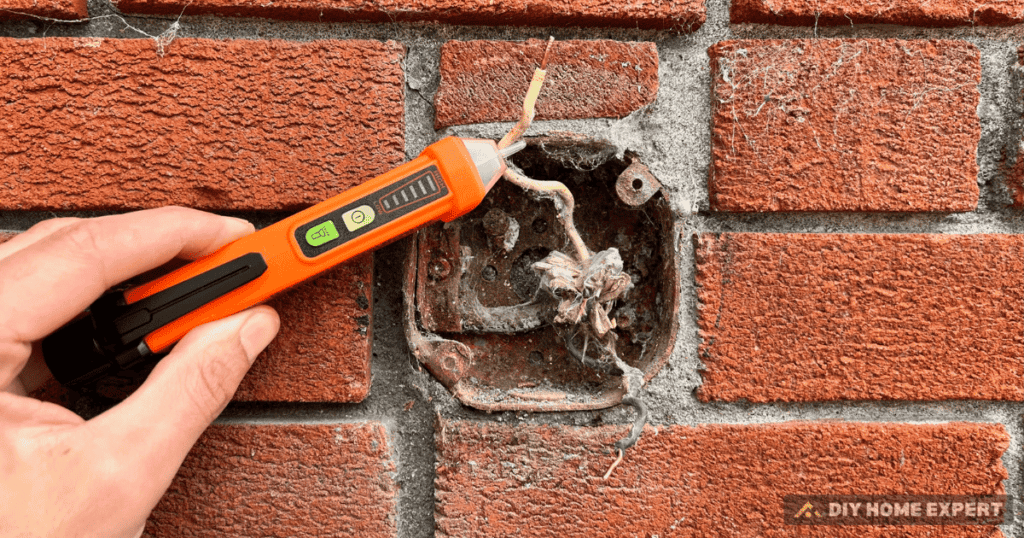
STEP 5 | Identify and Prepare the Wiring
Take a clear photo of the existing wiring setup before disconnecting anything. This will serve as a reference when you connect the new fixture. If you encounter aluminum wiring, special considerations are needed due to its tendency to loosen over time; consult a professional if unsure.
STEP 6 | Install the New Mounting Bracket
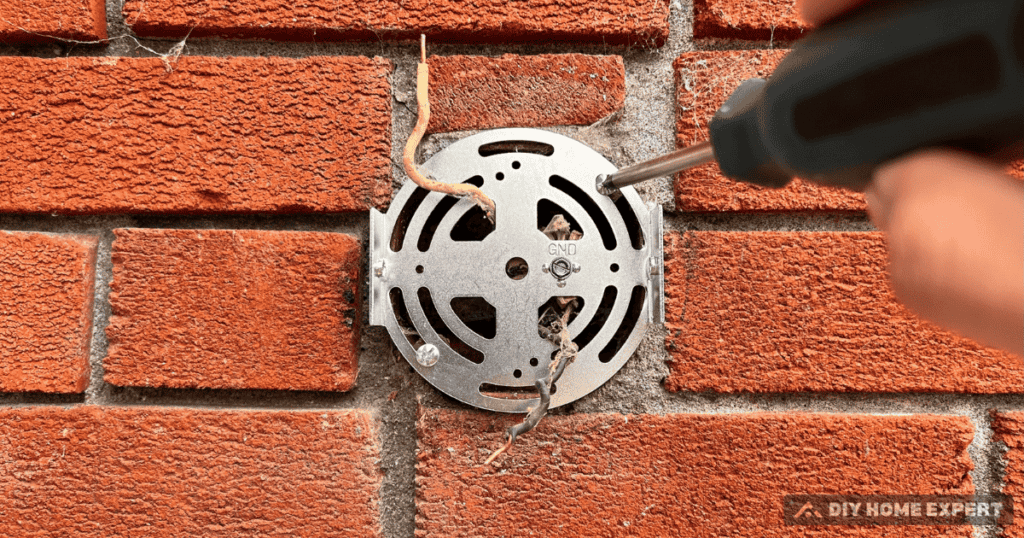
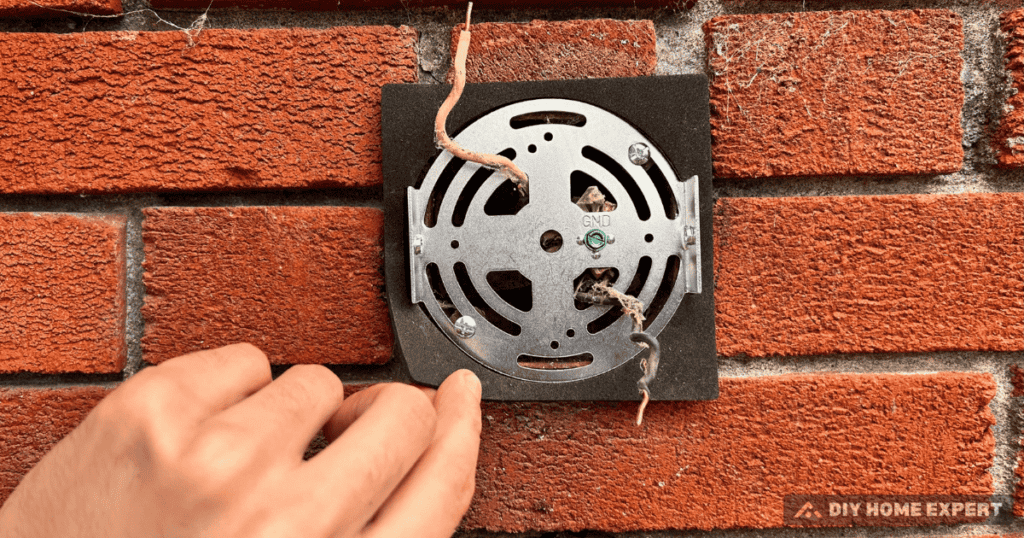
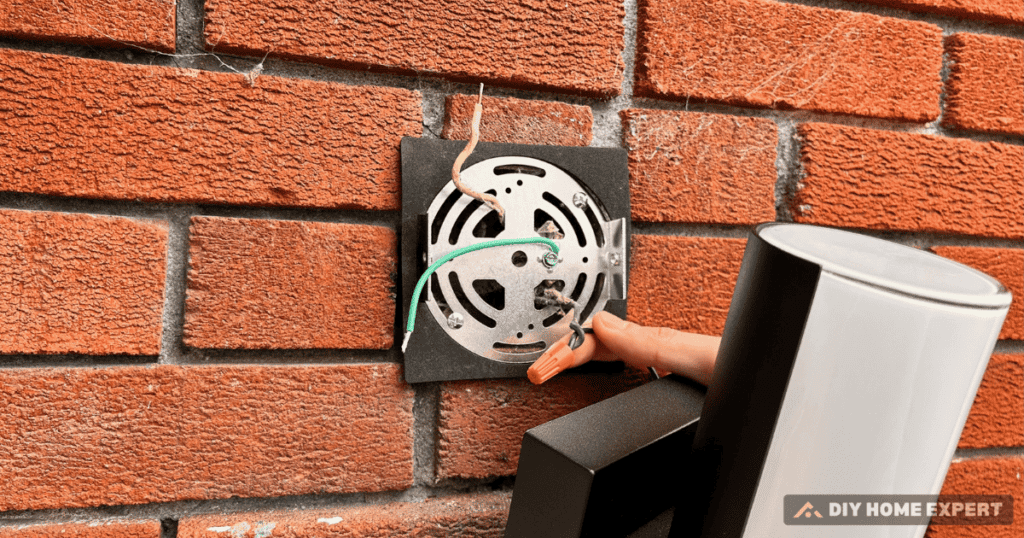
If the existing mounting bracket is incompatible or in poor condition, remove it using your electric drill. Position the new mounting bracket that came with your light fixture and secure it with the provided long machine screws. Ensure the bracket is level and firmly attached.
STEP 7 | Connect the Wires
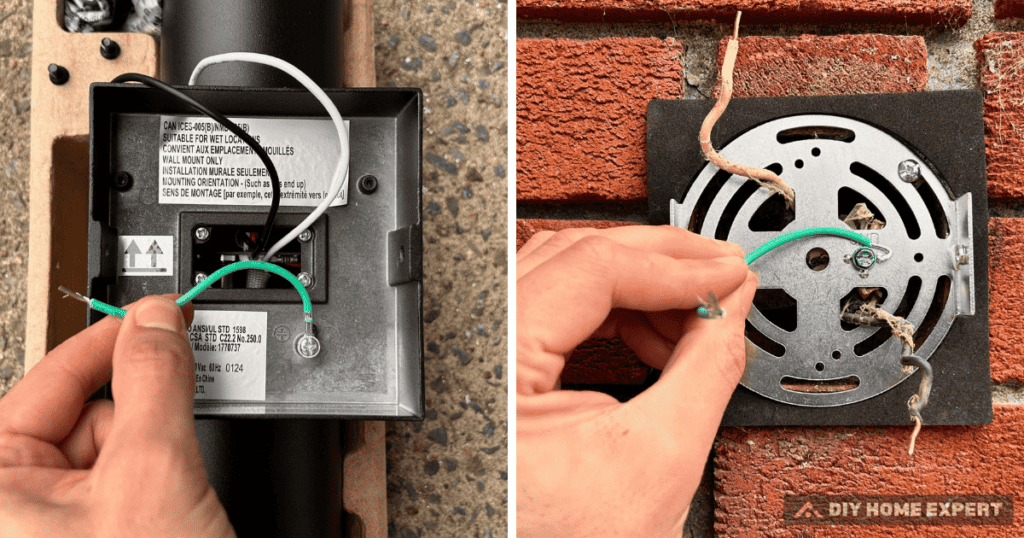
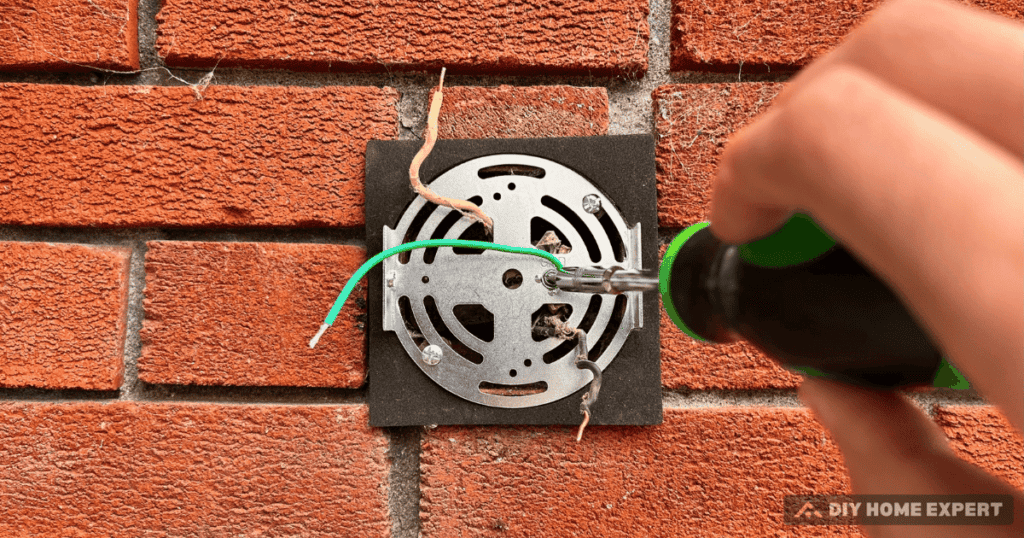
Typically, light fixture wiring involves matching color-coded wires: black to black (power), white to white (neutral), and green or bare copper to the ground screw on the bracket. If your fixture’s wires are stranded, twist each strand tightly before connecting them to ensure a solid, safe connection. Use the wire nuts to secure each connection and wrap them with electrical tape for added safety.
STEP 8 | Secure the Fixture
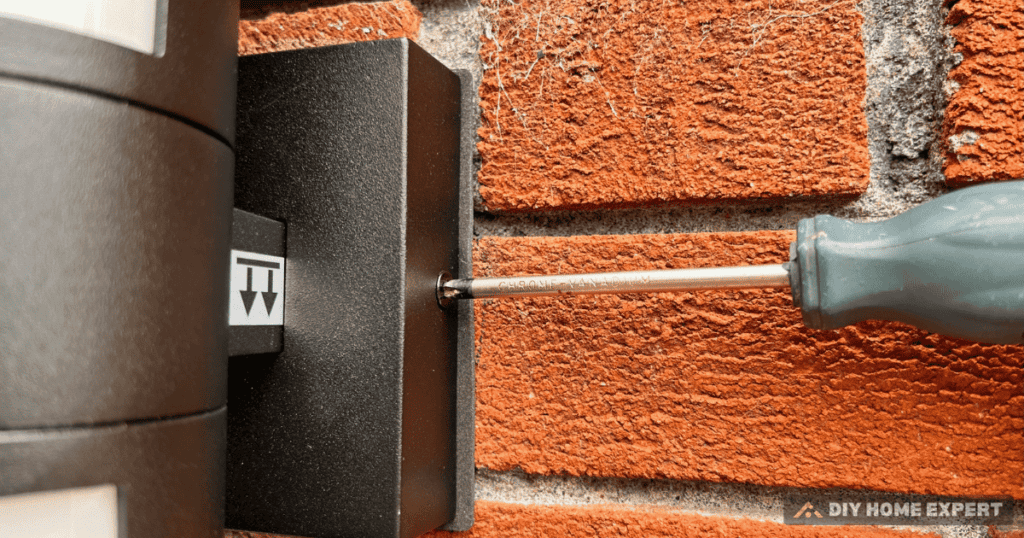
Align the new light fixture with the mounting bracket and attach it using the screws or caps provided. Adjust the positioning of the fixture to ensure it is level and securely attached. This may require rotating the fixture slightly before fully tightening it into place.
STEP 9 | Final Setup
Cover any exposed wires or connections with the fixture’s final cover plate, then install the light bulb. This is also a good time to clean the lens of the light fixture to ensure maximum brightness and efficiency.
STEP 10 | Testing and Adjusting
Testing the Light
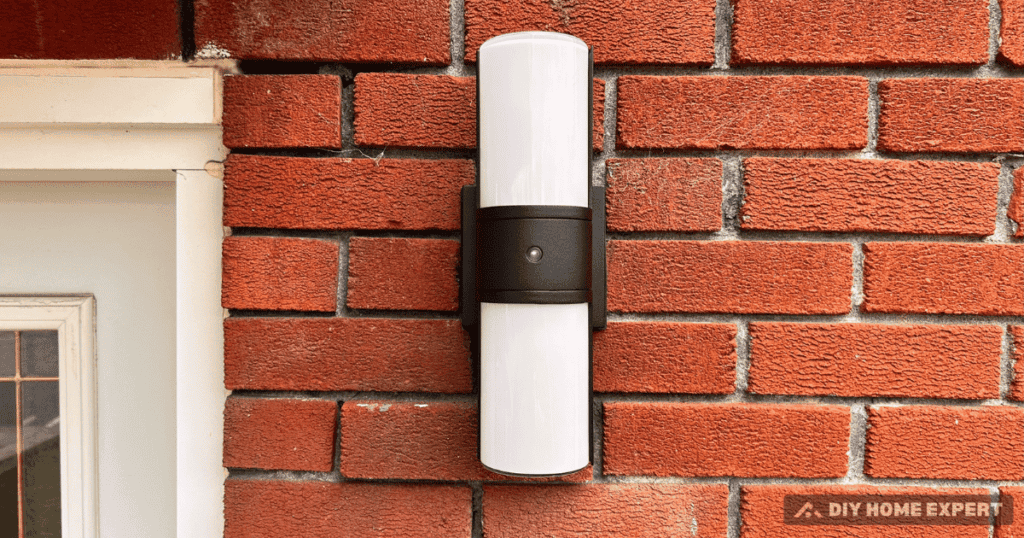
Once the new fixture is installed and the bulb is in place, restore power at the breaker panel. Turn on the light switch to test the new outdoor light. Ensure it lights up and functions as expected without flickering or humming.
Adjustments
If the light direction needs adjustment to better illuminate a path or entryway, carefully reposition the fixture to the desired angle. Make sure all screws and mounting hardware are tightened securely after any adjustments to prevent the fixture from moving or loosening over time.
Updating your outdoor light fixtures is a simple way to elevate your home’s exterior. For more DIY tips and home improvement ideas, follow us on Pinterest at DIY Home Expert.
Advanced Tips
Troubleshooting Common Issues
During the installation of your outdoor light fixture, you may encounter several common issues:
- Corrosion in the Electrical Box: If there is visible rust or corrosion inside the electrical box, it may affect the connection. Clean the area thoroughly or consider replacing the box if the damage is extensive.
- Misalignment: Sometimes the new fixture doesn’t align perfectly with the existing mounting holes. You can either drill new holes or use adjustable mounting brackets available at hardware stores.
- Faulty Wiring: Older homes may have outdated or worn-out wiring. If you notice brittle, cracked, or discolored wires, it’s best to consult a professional to replace the wiring to ensure safety and compliance with electrical codes.
Maintenance Tips
To ensure your outdoor light fixture continues to function efficiently and safely, regular maintenance is essential:
- Regular Cleaning: Dust and debris can accumulate on both the bulb and fixture, reducing brightness. Clean your outdoor lights every few months with a soft cloth and suitable cleaner.
- Check for Water Intrusion: Outdoor fixtures are prone to water damage. Inspect your fixtures periodically, especially after heavy rain, to ensure there is no water inside the lamp or electrical box.
- Bulb Replacement: Replace bulbs as soon as they burn out to maintain optimal lighting. Consider switching to LED bulbs if you haven’t already, for better energy efficiency and longer life.
Environmental Considerations
When disposing of your old outdoor light fixture, consider environmentally friendly options:
- Recycling: Check if your local waste management facility accepts old light fixtures for recycling.
- Donation: If the old fixture is still in good working condition, consider donating it to a local thrift store or community project.
Looking to change an indoor light switch too? Check out our guide here.

